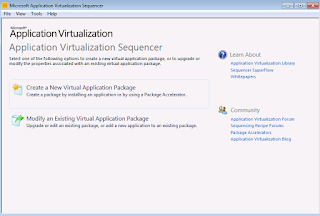
1) Launch the Microsoft Application Virtualization Sequencer from Start-> All Programs
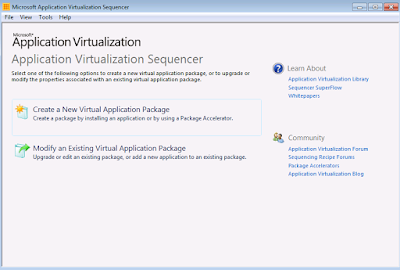
2) Select the create package (default) option.

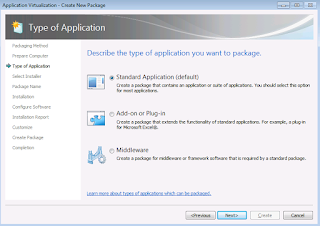
3) Select the "Standard application" type in the type of application to be sequenced.

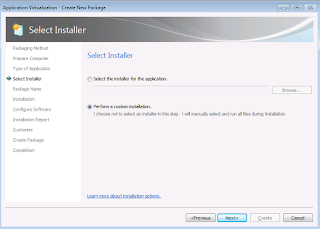
4) Select "Perform a custom installation" in the select installer screen and click next.

5) Provide the virtual application name as Adobe Reader 11.0.10 and click next.

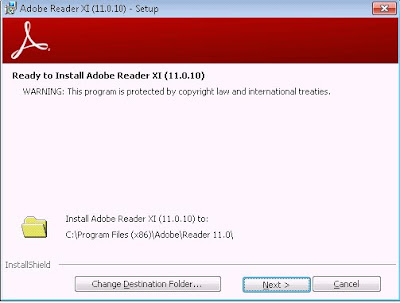
6) Click Next and Install the Adobe Reader application.
![]()


Click Finish.
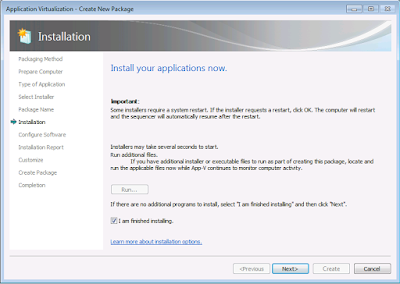
Select I am finished Installing and click next.

7) If there is any configuration to be done, you can do it in this stage. Or else click next.

8) Click Next.

9) Run the shortcut to capture FB1. If not needed simply click on next.

10) Select the Operating system to be supported and click Next.

11) Select continue to modify the package using Package editor. Remove the desktop shortcut.

12) Create a Powershell script named supressupdates.ps1 with the following script in order to suppress the check for updates tab under Help.
set-location hklm:
new-item -path .\software\policies -name adobe
new-item -path .\software\policies\adobe -name "Acrobat Reader"
new-item -path ".\software\policies\adobe\Acrobat Reader" -name 11.0
new-item -path ".\software\policies\adobe\Acrobat Reader\11.0" -name FeatureLockDown
new-itemproperty -path "HKLM:\software\policies\adobe\Acrobat Reader\11.0\FeatureLockDown\" -name "bUpdater" -propertytype dword -value 0
new-itemproperty -path "HKLM:\software\policies\adobe\Acrobat Reader\11.0\FeatureLockDown\" -name "bUsageMeasurement" -propertytype dword -value 0
new-itemproperty -path "HKLM:\software\policies\adobe\Acrobat Reader\11.0\FeatureLockDown\" -name "bProtectedMode" -propertytype dword -value 0
Create a powershell script named RegDelete.ps1. This will remove the entry from the physical registry during removal of the appv package.
Remove-Item -Path 'HKLM:\SOFTWARE\Policies\adobe\Acrobat Reader'–Recurse
Add these two scripts in the scripts folder in the appv package.
Navigate to Package > Scripts folder.
Right-Click the Scripts Folder and choose “Add” to add the above scripts into the package so that they can be leveraged on the client machine.

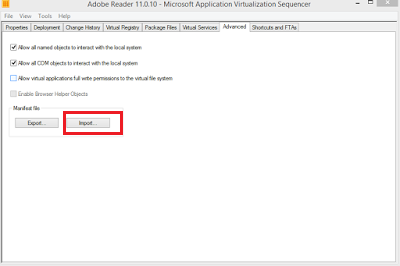
13) In the Package Editor Window, open the Advanced Tab and check the following checkboxes:
§ Allow COM Objects to interact with Local System.
§ Allow all named objects to interact with Local System.

14) In the Manifest file tab, click on export. This will export the AppxManifest.xml file to the local machine. choose the destination and click on save.
Open the exported AppxManifest.xml using AppVManifestEditor. You can download the tool from here AVME
You can select the checkbox on left hand side to enable the type of script you want, then enter the Path (Powershell.exe) and Arguments field. After editing, save the file using the SaveAs button found at the top right side.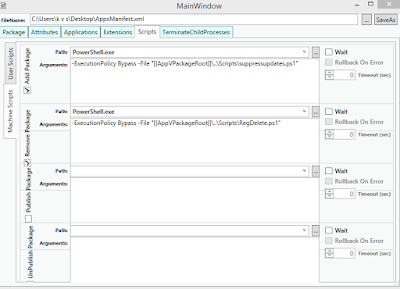
The output of the AppvManifest.xml will be like this.

In the Package Editor, select Import and choose the modified AppxManifest.xml file and select save in the sequencer.This will create the virtual Adobe Reader package with inbuilt scripts in the AppxManifest.xml file.
Installation procedure Using Powershell 3.0:
Step - Enable the scriptexecution policy in the client by using the following command.
Set-AppvClientConfiguration -EnablepackageScripts $true
This will enable the execution of scripts which we have added inside the package. If not set ,it will show error.
Step - Add the package using the following command.
Add-AppvClientPackage "path of the Adobe Reader 11.0.10.appv file"
Step - Publish the package using the following command.
Publish-AppvClientPackage "Adobe Reader 11.0.10"–Global
Step - Mount the package.
Mount-AppvClientPackage "Adobe Reader 11.0.10"